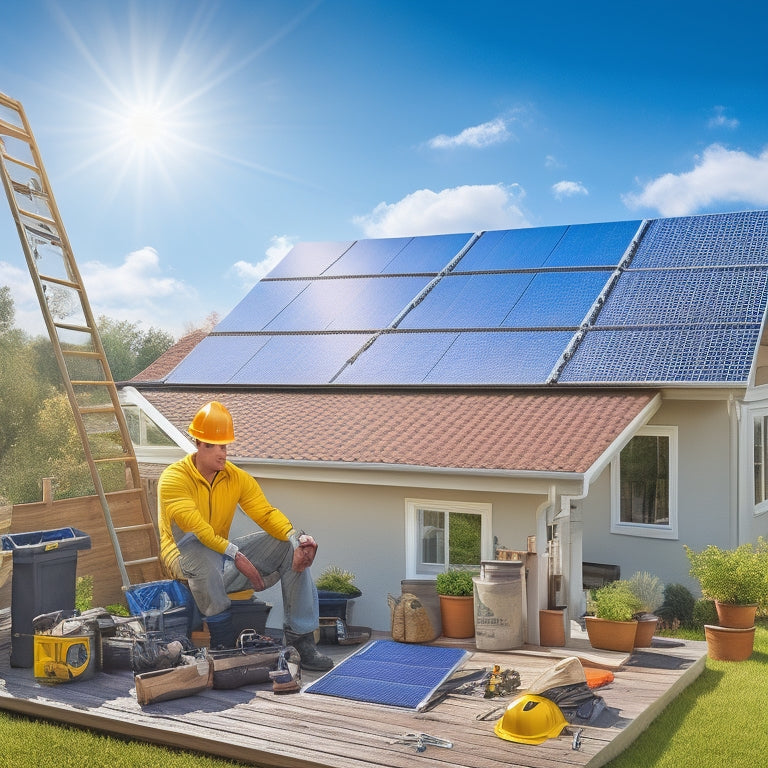
7 Essential Tips for DIY Solar Panel Installation
You're about to start on a DIY solar panel installation, which requires careful planning and execution to guarantee a safe and efficient system that meets your energy needs. Begin by evaluating your energy requirements, selecting the right equipment, and preparing your roof structure. Make sure proper wiring connections, mount and secure your panels correctly, and connect to the inverter and grid. Finally, test and inspect the system to ensure it's functioning at its best. To guarantee a successful installation, it's essential to get every step right, and following these essential tips will get you started on the right path to harnessing clean energy.
Key Takeaways
• Assess your daily energy needs by calculating your energy consumption in watt-hours and identifying peak usage hours to ensure an adequately sized solar panel system.
• Choose high-efficiency solar panels and inverters that are compatible with each other and durable enough to withstand environmental stresses.
• Verify your roof's structural integrity and address any issues before installation to ensure it can support the weight of the solar panels.
• Ensure proper wiring connections by minimizing voltage drop, using correct connectors, and labeling cables clearly for maintenance and upgrades.
• Mount and secure solar panels at an ideal angle to maximize sunlight capture, and choose a suitable racking system for your roof type to withstand environmental stresses.
Assess Your Energy Needs
Evaluate Your Energy Needs
Before installing a DIY solar panel system, determine how much energy you need to generate by calculating your daily energy consumption in watt-hours (Wh) to guarantee you size your system correctly. This step is vital to make sure your solar panel system meets your energy demands. Conduct an energy audit to identify your consumption patterns, which will help you determine the total wattage required.
Start by tracking your energy usage over a month to identify peak hours and average consumption. You can do this by reviewing your past utility bills or using a smart plug to monitor your appliances' energy usage. Identify the appliances that consume the most energy and their corresponding wattage. Add up the total wattage to determine your daily energy consumption in Wh.
Accurately evaluating your energy needs will ensure your DIY solar panel system is adequately sized, providing you with the power you need while minimizing energy waste.
Choose the Right Equipment
With your energy needs assessed, you'll need to select the right solar panels, inverters, and mounting hardware to guarantee that your DIY solar panel system operates efficiently and effectively. The quality of your equipment will directly impact the performance and longevity of your system. When choosing solar panels, prioritize panel durability and look for high-efficiency panels with a long warranty period.
Here's a comparison of key equipment considerations:
| Equipment | Quality Factors | Considerations |
|---|---|---|
| Solar Panels | Efficiency, Durability, Warranty | High-efficiency panels (>20%) for maximum energy output, durable panels with a 25-year warranty |
| Inverters | Efficiency, Compatibility, Monitoring | High-efficiency inverters (>97%), compatibility with your panel array, real-time monitoring capabilities |
| Mounting Hardware | Durability, Adjustability, Compatibility | Durable hardware with a long warranty, adjustable to accommodate different roof angles, compatible with your roof type |
Prepare Your Roof Structure
You'll need to verify your roof's structural integrity to guarantee it can support the weight and stress of the solar panel system, so inspect your roof's condition and identify any necessary repairs or upgrades before installation.
A thorough roof inspection is important to make sure your solar panels are securely fastened and won't compromise your roof's integrity. Check for signs of wear, damaged or missing shingles, and curled or buckled roofing materials. Confirm that your roof's decking is sturdy and can support the added weight of the solar panels.
If you find any issues, address them promptly. You may need to replace damaged or rotten wood, or add structural reinforcement to support the weight of the solar panels. This is particularly important if you have an older roof or one with a complex design.
Ensure Proper Wiring Connections
Properly connecting the wiring is crucial to the overall performance and safety of your solar panel system. Connect the cables securely to the inverter and other components to guarantee a flawless flow of electricity. You'll need to make sure that the voltage drop across the cables is minimized to prevent energy loss. A good rule of thumb is to keep the voltage drop below 2% to maintain peak system efficiency.
To achieve this, you'll need to perform a thorough circuit analysis to determine the correct wire gauge and cable length. This will help you identify potential bottlenecks in the system and optimize the wiring configuration. Additionally, make sure to follow the manufacturer's guidelines for wiring and connectivity to avoid any compatibility issues.
When connecting the cables, use the correct connectors and ensure they're securely fastened to prevent overheating or electrical shock. Remember to label the cables clearly to avoid confusion during maintenance or upgrades.
Mount and Secure Panels
Secure your solar panels to the mounting system, guaranteeing a sturdy and level installation that can withstand environmental stresses and maintain peak energy harvesting efficiency. A well-secured installation is crucial to maximizing energy production and preventing damage to your system.
When mounting your panels, consider the following key factors:
-
Panel Angles: Make sure your panels are tilted at an ideal angle to capture the most sunlight. A general rule of thumb is to tilt your panels at an angle equal to your latitude.
-
Racking Options: Choose a racking system that suits your roof type and ensures secure attachment. Popular options include rail-based, clip-based, and shared-rail systems.
-
Structural Integrity: Verify that your roof can support the weight of the solar panels and mounting system. Consult with a structural engineer if you're unsure.
Connect to Inverter and Grid
With your solar panels mounted and secured, it's time to connect them to an inverter, which converts DC power into AC, and then to the grid, allowing you to feed excess energy back into the system and offset your electricity bill. This critical step requires attention to detail and adherence to safety protocols.
Confirm your inverter is compatible with your solar panel system and meets local electrical codes. Connect the inverter to the DC output of your solar panels, taking care to follow the manufacturer's instructions.
Next, connect the inverter to the grid through a grid-tie inverter, which synchronizes your system with the grid's frequency and voltage. Grid Synchronization is essential to ensure a safe and efficient energy transfer.
Regular Inverter Maintenance is also crucial to prevent system downtime and optimize energy production. Check your inverter's display for error codes, and perform routine firmware updates to ensure peak performance.
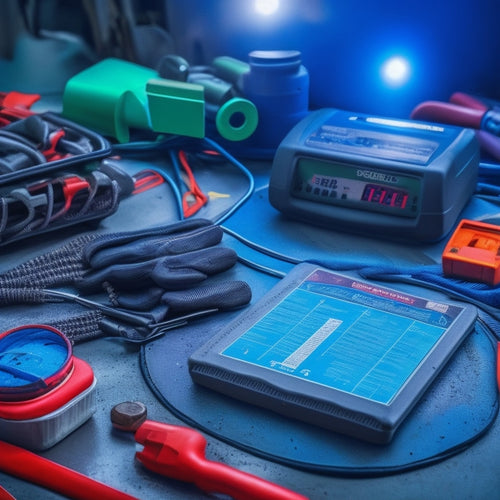
Test and Inspect the System
You're now ready to test and inspect your solar panel system to make sure it's functioning safely and efficiently. This is a critical step, as it guarantees your system is generating power as expected and meets safety protocols.
Before you start testing, double-check that all connections are secure, and safety protocols are in place. Then, turn on the system and monitor its performance using the following key metrics:
-
Voltage: Verify that the voltage output matches the inverter's specifications.
-
Current: Check that the current output is within the expected range.
-
Power: Confirm that the system is producing the anticipated amount of power.
As you inspect the system, look for signs of wear, damage, or malfunction. Check for overheating, loose connections, or signs of electrical arcing. Take note of any issues and address them promptly to ensure your system operates safely and efficiently.
Frequently Asked Questions
Can I Install Solar Panels on a Metal or Clay Tile Roof?
You can install solar panels on a metal or clay tile roof, but be prepared for unique challenges; metal roofs may require specialized mounting systems, while clay tiles may need additional structural support, affecting roof compatibility and installation complexity.
How Do I Handle Shading From Trees or Nearby Structures?
When evaluating shading from trees or structures, you'll need to use tree trimming strategies and shading mitigation techniques to maximize your solar panel's energy output, ensuring peak performance and power generation.
Are DIY Solar Panel Installations Eligible for Government Rebates?
'Are you leaving money on the table? Yes, your DIY solar panel installation is eligible for government rebates, including federal tax credits and incentives, which can greatly offset your investment costs.'
Can I Add More Panels to My System in the Future?
You can easily expand your system in the future by adding more panels, ensuring system expansion and future upgrades are seamless, as long as your initial installation is designed with scalability in mind.
Will Solar Panels Still Generate Power During a Power Outage?
During a power outage, you can harness solar power with grid independence, but only if you've installed backup systems, like batteries, to store excess energy, ensuring you'll still generate power when the grid fails.
Related Posts
-
5 Essential Car Battery Maintenance Tips
You can extend your car battery's lifespan and prevent unexpected breakdowns by following five essential maintenance ...
-

5 Best Practices for Long-Lasting Sustainable Batteries
To maximize the lifespan of your batteries, you should optimize charging cycles by maintaining a charge level between...
-

What Eco-Friendly Vehicles Can You Buy Online Today?
You can now browse and buy a wide range of eco-friendly vehicles online, from electric cars with solar roofs to solar...


