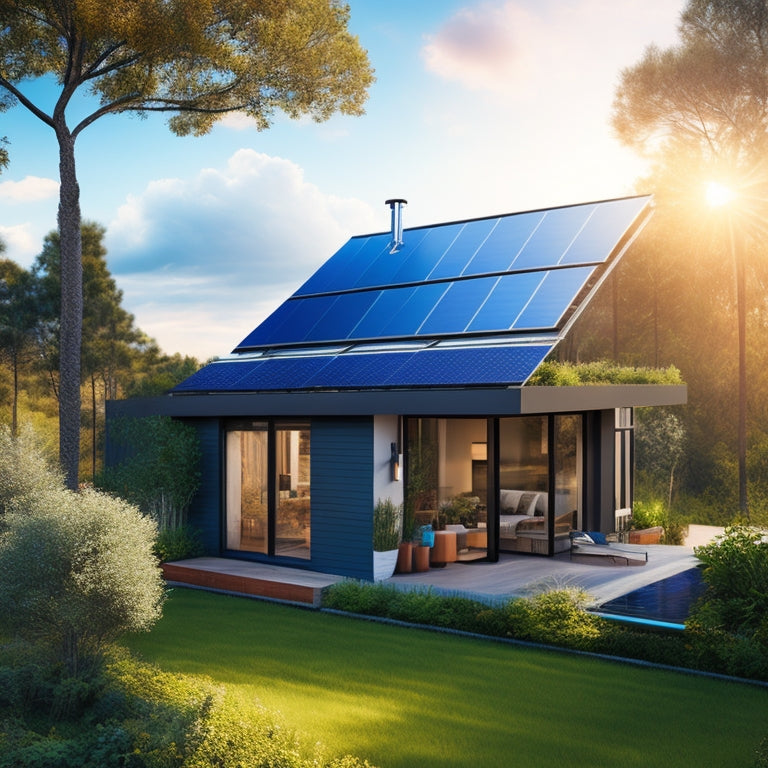
Design and Install Your Own Solar Panel System
You're about to start on a journey to harness the sun's energy and slash your utility bills. To design and install your own solar panel system, you'll need to determine your energy needs by analyzing consumption patterns and reviewing utility bills. Next, choose the right equipment, evaluating your roof's suitability and designing your solar panel array for best energy production. You'll also need to plan for energy storage, prepare for installation day, and assemble and mount the panels. As you follow these important steps, you'll be well on your way to harnessing renewable energy - and uncovering the intricacies of a successful solar panel system installation.
Key Takeaways
• Conduct an energy audit to determine your energy needs and size your solar panel array accordingly.
• Choose efficient solar panels from reputable manufacturers and ensure compatibility with your roof's orientation and shading.
• Select the right energy storage system and plan for maintenance, grid compatibility, and logistics for equipment delivery.
• Assemble and mount the solar panels securely, connecting them to the inverter and ensuring all electrical connections are correct.
• Test the system with a soft startup, configure the inverter, and verify the system's performance and safety.
Determine Your Energy Needs
Determining your energy needs is crucial to designing an efficient solar panel system, as it determines the size and number of panels required to power your home or business.
To accurately determine your energy needs, you'll need to conduct an energy audit, which involves analyzing your historical consumption patterns. This will give you a clear picture of your energy usage habits, including peak hours, daily consumption, and seasonal variations.
Reviewing your past utility bills is a great starting point. Look for patterns and trends in your energy consumption, such as increased usage during summer months or peak hours in the morning and evening.
You can also use online tools and calculators to estimate your energy needs based on factors like your location, home size, and appliance usage.
Choose the Right Equipment
With your energy needs assessed, you can now select the suitable solar panel system components that will efficiently meet your energy demands. Choosing the right equipment is important to guarantee ideal performance, reliability, and cost-effectiveness.
Start by evaluating solar panels from reputable brands, considering factors such as efficiency ratings, durability, and warranty periods. Look for equipment warranties that cover at least 25 years, with performance guarantees of 80% or higher. Conduct brand comparisons to identify the best-suited options for your specific needs.
Research manufacturers like Tesla, SunPower, and Panasonic, analyzing their product offerings, pricing, and customer reviews. Additionally, consider the inverters, mounts, and monitoring systems that will complement your solar panels. Ensure these components are compatible and certified to industry standards.
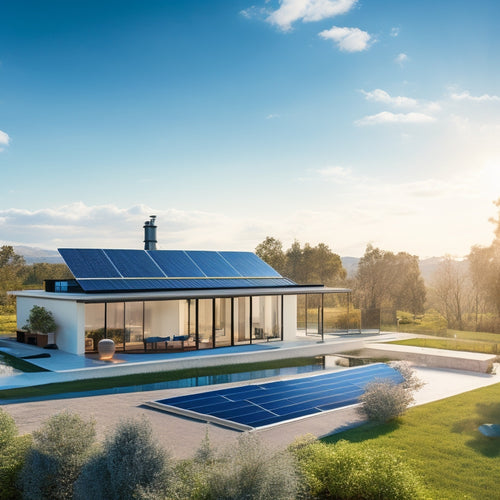
Assess Your Roof's Suitability
When evaluating your roof's suitability for a solar panel system, you'll need to consider two critical factors: the orientation of your roof and potential shading issues.
You'll want to determine if your roof receives sufficient sunlight throughout the day and year, taking into account any obstructions that might impact energy production.
Roof Orientation Matters
You'll want to evaluate your roof's orientation, as a south-facing roof receives the most sunlight throughout the year, making it ideal for solar panel installation.
A south-facing roof with a pitch between 15° and 40° is considered best, as it allows for the perfect solar angle. This orientation guarantees that your solar panels receive direct sunlight for most of the day, maximizing energy production.
However, if your roof doesn't face directly south, don't worry – you can still install solar panels. East- and west-facing roofs can also work, although they mightn't produce as much energy.
It's important to assess your roof's pitch as well, as a shallow pitch can lead to snow accumulation and reduced energy production. A steeper pitch, on the other hand, may require additional structural support.
Roof Shading Analysis
Assess your roof's suitability by identifying potential shading obstacles, such as nearby trees, buildings, or skylights, that could impact your solar panel system's energy production. A thorough roof shading analysis is important to determine the ideal placement and orientation of your solar panels.
You'll want to inspect your roof for any obstructions that could cast a shadow on your panels, reducing their energy output. Take note of any tree overhang, as even partial shading can greatly decrease energy production. Consider trimming or removing trees that cast a shadow on your roof.
Also, be mindful of neighborhood obstructions, such as adjacent buildings or chimneys, that could block sunlight. Skylights, vents, or other roof features can also cast shadows, so make sure you factor these in when planning your solar panel layout.
Design Your Solar Panel Array
To maximize energy harvesting, your solar panel array's design must carefully balance factors like panel orientation, tilt, and shading to guarantee peak energy production. A well-designed array is essential to harnessing the sun's energy efficiently.
When designing your solar panel array, consider Array Aesthetics, ensuring the panel layout complements your roof's architecture. This harmonious blend of form and function won't only enhance your home's curb appeal but also increase your property's value.
In terms of Panel Patterns, you'll need to decide on the best configuration for your roof. A standard configuration features rows of panels, but you can also opt for a more customized design, such as a staggered or alternating pattern. This flexibility allows you to adapt the array to your roof's unique dimensions and obstacles.
Plan for Energy Storage
How much energy do you need to store to guarantee a reliable power supply during periods of low sunlight or at night, and what type of energy storage system will best meet your needs? To determine this, calculate your daily energy requirements and consider factors like your solar panel array's size, local solar irradiance, and your energy usage patterns.
You'll want to select a battery type that suits your needs, such as lead-acid, lithium-ion, or saltwater batteries. When choosing a battery, consider its depth of discharge (DOD), round-trip efficiency, and lifespan. You'll also need to plan for battery maintenance, including regular checks and replacements, to ensure peak performance.
If you're planning a grid connection, you'll need to ensure your energy storage system is compatible with the grid's frequency and voltage requirements. A grid-tied system allows you to sell excess energy back to the grid and draw from it when needed, providing a reliable power supply.
Careful planning and selection of your energy storage system will guarantee a seamless and efficient power supply, even during periods of low sunlight or at night.
Prepare for Installation Day
As you approach the installation phase of your solar panel system, it's crucial to prepare your site and coordinate logistics to guarantee a smooth installation process.
You'll need to complete a site preparation checklist to clear the area, remove any obstacles, and establish a safe working environment.
Additionally, you'll need to arrange for system delivery and coordinate with your installation team to confirm the delivery details.
Site Preparation Checklist
You'll need to make sure your site is ready for installation by completing a series of essential preparations to guarantee a smooth and efficient installation process. This checklist will make certain that your site is ready for the installation team.
First, confirm you have adequate ground clearance around the installation area. This will provide easy access for the installation team and prevent any obstacles that might hinder the process. A minimum of 10 feet of clearance around the perimeter is recommended.
Next, focus on vegetation management. Overgrown vegetation can pose a significant risk to the installation team and the system itself. Clear any debris, trim trees, and remove any weeds or bushes that may be obstructing the area. This will also ensure that the solar panels receive optimal sunlight.
Additionally, make certain that the site is free from any hazardous materials and that all necessary permits are in place.
Finally, designate a parking area for the installation team and ensure that they've access to necessary amenities such as restrooms and water.
System Delivery Logistics
With your site preparation complete, the next essential step is coordinating the logistics of system delivery to guarantee a seamless installation process on the designated installation day. You've invested time and effort into designing your solar panel system, and now it's important to make sure that all components arrive safely and on schedule.
To achieve this, consider the following key aspects of system delivery logistics:
-
Freight Options: Choose a reliable shipping carrier that specializes in handling fragile and oversized solar equipment. Ensure they provide real-time tracking and insurance coverage.
-
Warehouse Management: Verify that your equipment is stored in a secure, climate-controlled warehouse to prevent damage from environmental factors.
-
Delivery Scheduling: Coordinate with your installer and freight carrier to schedule a delivery window that aligns with the installation timeline.
-
Component Inspection: Inspect all components upon arrival to identify any damage or discrepancies.
-
Inventory Management: Organize and label all components to facilitate efficient installation and minimize delays.
Assemble and Mount Panels
Your solar panel system's electrical performance relies heavily on the precise assembly and secure mounting of the panels, which involves carefully connecting the panels' electrical connectors and securely fastening them to the mounting hardware.
To begin, make sure each panel frame is properly aligned and securely attached to the mounting rails. These rails, typically made of anodized aluminum, provide a sturdy foundation for your solar array.
Next, connect the electrical connectors, following the manufacturer's instructions to guarantee proper polarity and secure connections. Use torque wrenches to tighten the connectors to the recommended specifications.
Once all panels are connected, secure them to the mounting rails using the provided hardware, ensuring a snug and level fit. Double-check your work, verifying that all connections are secure and the panels are properly seated.
A well-assembled and mounted solar panel system is vital for efficient energy production, so take your time and attention to detail will pay off in the long run.
Connect and Test the System
Now that your solar panels are securely mounted and connected, turn your attention to the electrical components, connecting the panels to the inverter and the rest of the system. This vital step requires attention to detail and adherence to electrical safety guidelines to guarantee a safe and efficient system.
As you integrate the components, keep the following key considerations in mind:
-
Verify wire sizing and connections: Make sure all wires are properly sized and connected to handle the maximum power output of your solar panels.
-
Ground the system: Grounding the system is essential for electrical safety; make sure to follow the manufacturer's instructions and local electrical codes.
-
Configure the inverter: Set the inverter to optimize energy production and monitor system performance.
-
Check for electrical leaks: Use a multimeter to detect any electrical leaks or shorts in the system.
-
Perform a soft startup: Gradually introduce power to the system to avoid sudden spikes or damage to components.
Frequently Asked Questions
Can I Install Solar Panels on a Metal or Clay Tile Roof?
When considering solar panels, you'll need to confirm that your metal or clay tile roof can support the added weight and stress. Assess your roof's integrity and verify tile compatibility to guarantee a secure and efficient installation.
Do Solar Panels Produce Electricity on Cloudy or Rainy Days?
"You think solar panels are useless on cloudy days? Think again! While they produce less energy, you can still harness some power. But, with energy storage, you'll be prepared for any weather patterns, ensuring a steady flow of electricity, even on rainy days."
Will My Solar Panel System Work During a Power Outage?
During a power outage, you'll need a battery backup system to guarantee your solar panel system keeps working, providing you with grid independence and backup power, but it requires specific equipment and installation.
How Long Does It Take to Recoup the Cost of a Solar Panel System?
"As you plant a tree, you reap a harvest; similarly, your solar panel investment yields financial fruit. Your payback period depends on ROI analysis, but typically, cost savings kick in within 5-7 years, making your investment bloom with long-term benefits."
Can I Add More Panels to My System in the Future?
You can easily expand your system in the future, adding more panels as needed, thanks to the flexibility of modern solar panel systems, making system expansion and future upgrades a seamless process.
Related Posts
-
What Are the Best Eco-Friendly Rides for Campus?
As you navigate your college campus, you have a wide range of eco-friendly ride options to choose from, including bic...
-
Why Opt for High-Efficiency Solar Panels Online?
You can greatly enhance your solar energy output and savings by upgrading to high-efficiency solar panels, which can ...
-

Why Choose Green Automotive Accessories for Your Ride?
By switching to eco-friendly automotive accessories, you can reduce your carbon footprint, save up to 20% on fuel cos...


