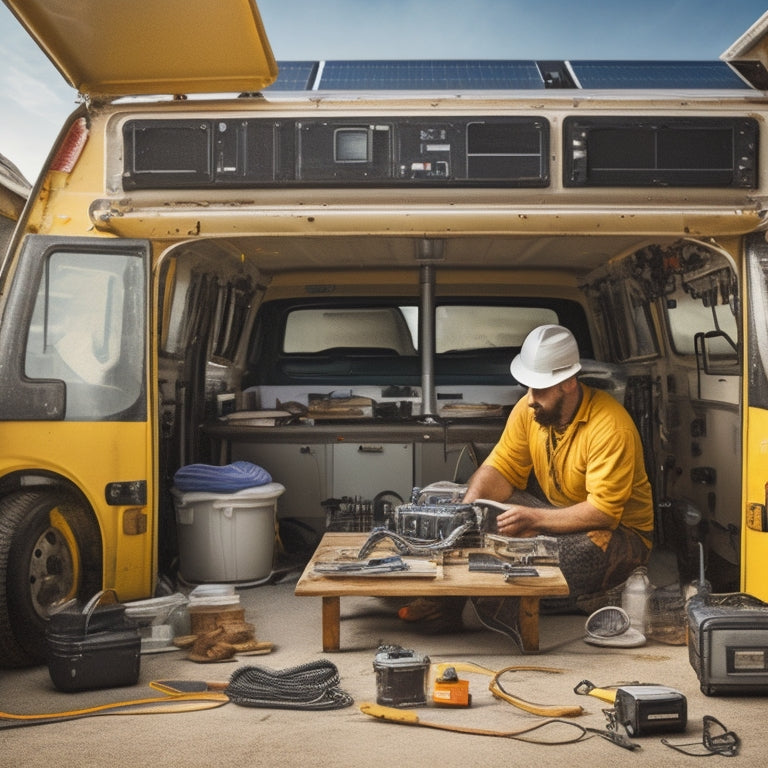
Install Solar Panels on Your Vehicle: A DIY Guide
To install solar panels on your vehicle, start by choosing the right panels based on your energy requirements, considering wattage, voltage, and ampere rating. Prepare your vehicle's surface by cleaning it thoroughly and removing obstacles. Measure and mark the roof accurately, considering shape and obstructions. Drill and mount brackets securely, ensuring a watertight seal. Connect and wire the panels, following electrical connection compatibility and safety guidelines. Finally, test the system and monitor performance. By following these steps, you'll be well on your way to harnessing the power of the sun - and there's more to learn about optimizing your vehicle's solar setup.
Key Takeaways
• Choose the right solar panels based on your vehicle's energy requirements, considering wattage, voltage, and ampere ratings.
• Prepare your vehicle's surface by cleaning it thoroughly and removing obstacles to ensure a strong bond for the adhesive.
• Measure your vehicle's roof size accurately and create a detailed diagram of obstacles to ensure a safe and efficient installation.
• Mount and secure the solar panels at a favorable angle for energy harvesting, using high-quality, weather-resistant mounting hardware.
• Connect and wire the solar panels correctly, ensuring secure, waterproof connections that meet system requirements and following electrical safety principles.
Choosing the Right Solar Panels
When selecting solar panels for your vehicle, pick ones that match your energy requirements, taking into account the panel's wattage, voltage, and ampere rating to guarantee a compatible and efficient system. You want to make sure that the panels can provide the necessary power to meet your energy needs.
Importance ratings are vital in determining the performance of your solar panels. Look for panels with high importance ratings to maximize energy production. A higher importance rating means more energy can be generated per hour of sunlight.
Additionally, consider the panel's durability, as it will be exposed to various environmental conditions on the road. A durable panel can withstand harsh weather conditions, road vibrations, and other external factors that might affect its performance.
When choosing your solar panels, prioritize those with a high-importance rating and durable construction. This will ensure you get the most out of your solar panel system, providing you with a reliable source of energy on the go.
Preparing Your Vehicle's Surface
As you prepare your vehicle's surface for solar panel installation, you'll need to make sure it's spotless and free of obstacles.
Start by giving your vehicle a thorough cleaning to remove any dirt, dust, or debris that might interfere with the installation process.
Next, take a close look at your vehicle's surface and remove any existing accessories or features that could get in the way of a secure and efficient installation.
Clean Surface Preparation
You'll need to meticulously remove dirt, dust, and other contaminants from your vehicle's surface to guarantee a strong bond between the solar panels and the surface. This step is vital, as any remaining impurities can compromise the adhesive's effectiveness.
To make sure a clean surface, start by washing your vehicle using a mild soap and water. Avoid using harsh chemicals or abrasive materials that could scratch the paint.
Next, use a surface cleaning solution specifically designed for automotive paint to remove any remaining dirt, grime, or wax residue. Pay particular attention to the areas where the solar panels will be mounted.
For added protection, consider applying a paint protection film or clear bra to the affected areas. This will help prevent damage to the paint and ensure a smooth, even surface for the solar panels.
Removing Obstacles Completely
Precision is key in this step, as any protrusions, moldings, or emblems on your vehicle's surface can interfere with the solar panels' fit and functionality, necessitating their removal or modification. You must guarantee a smooth, obstacle-free surface for best solar panel performance.
Clearing clutter from your vehicle's surface is essential, and overcoming fears of modifying your vehicle will pay off in the long run.
To remove obstacles completely, follow these steps:
-
Identify potential obstacles: Inspect your vehicle's surface, taking note of any protrusions, moldings, or emblems that may interfere with the solar panels.
-
Remove or modify obstacles: Use the necessary tools to eliminate or modify obstacles, ensuring a smooth surface for the solar panels.
-
Verify surface integrity: Double-check the surface for any remaining obstacles or imperfections, making adjustments as needed.
Measuring and Marking the Roof
As you prepare to install solar panels on your vehicle's roof, it's essential to measure the available space accurately. You'll need to take into account the roof's size, factoring in any obstructions such as vents, antennas, or skylights that may impact panel placement.
Roof Size Considerations
Measure your vehicle's roof to determine the maximum size of the solar panel array that can be installed, taking into account any obstructions, such as roof rails, antennas, or skylights. You'll need to take into consideration the load capacity of your vehicle's roof to make sure it can handle the weight of the solar panels. A good rule of thumb is to calculate the total weight of the solar panels and mounting system, and then add a 20% safety margin.
When measuring your roof, keep the following factors in mind:
-
Roof shape: A flat roof provides the most usable space, while curved or angled roofs may require more complex mounting systems.
-
Obstruction clearance: Make sure you leave enough clearance around obstructions like roof rails, antennas, or skylights to allow for easy installation and maintenance.
-
Panel orientation: Take into account the ideal orientation of your solar panels to maximize energy output, taking into consideration the direction of travel and potential shading from surrounding features.
Measuring for Obstacles
You'll need to map out the location of every obstacle on your vehicle's roof to guarantee a successful solar panel installation. From roof vents to skylights, it's important to identify and measure each obstacle to ensure a secure and efficient installation.
To conduct a thorough shade analysis, create a detailed diagram of your vehicle's roof, noting the location and size of each obstacle. Consider wind resistance when measuring for obstacles, as a smooth airflow is important for top-notch solar panel performance.
| Obstacle Type | Measurement |
|---|---|
| Roof Vent | 2 inches diameter, 3 inches from edge |
| Skylight | 12 inches x 18 inches, centered |
| Antenna | 1 inch diameter, 6 inches from edge |
| Satellite Dish | 24 inches diameter, 4 inches from edge |
When measuring, take note of the distance from each obstacle to the edge of the roof, as well as its size and shape. This information will be crucial when marking the area for solar panel installation. By taking the time to accurately measure and record each obstacle, you'll ensure a successful and efficient solar panel installation that meets your energy needs.
Marking the Area
With your detailed diagram of obstacles in hand, transfer the measurements to your vehicle's roof, meticulously marking the area where the solar panels will be installed. This step is essential to guarantee a precise fit and ideal energy harvesting. Using a marker or tape, outline the boundary of the solar panel array, taking care to avoid any obstructions or sensitive areas.
Next, perform a boundary check to make sure the marked area is free from any obstacles that could interfere with the solar panels' performance. This includes checking for any roof racks, antennas, or other features that may compromise the panels' angle or efficiency.
To optimize the solar panels' angle, consider the following:
-
** Orientation**: Mark the area to make sure the solar panels are aligned with the direction of the sun's movement.
-
Tilt: Mark the area to achieve the best angle for maximum energy harvesting.
-
Clearance: Mark the area to maintain a safe distance from any obstructions or sensitive areas.
Drilling and Mounting Brackets
Secure the solar panel to a sturdy surface by drilling holes in the vehicle's roof or trunk lid, guaranteeing a watertight seal and precise alignment with the mounting brackets. Measure the bracket design carefully to make sure of a snug fit. You'll want to mark the drill points with a center punch to avoid slipping. Use a drill bit specifically designed for metal to minimize damage to the vehicle's surface. When drilling, apply steady, consistent pressure, and work from the center outwards to prevent warping.
For added security, consider clamp alternatives, such as adhesive-backed brackets or magnetic mounts, which can provide additional holding power without damaging the vehicle's finish. These options are particularly useful if you're not comfortable drilling into the vehicle's surface.
Regardless of the mounting method, verify the brackets are rated for the weight and size of your solar panel. Double-check the manufacturer's instructions for specific torque and tightening specifications to ensure a secure fit. With the brackets in place, you're ready to move on to the next step in the installation process.
Connecting the Solar Panels
Before you begin connecting the solar panels, make sure that the wiring and electrical connections are compatible with your vehicle's electrical system to prevent damage or electrical shock. It's essential to guarantee Solar Safety by following the manufacturer's instructions and taking necessary precautions.
When connecting the solar panels, consider the following key factors:
-
Panel Orientation: Ensure the solar panels are installed at a favorable angle to maximize energy generation. A tilted angle can improve energy output, but be cautious not to obstruct airflow or compromise the vehicle's aerodynamics.
-
Electrical Connections: Verify that the electrical connections are secure, waterproof, and meet the vehicle's electrical system requirements.
-
Wiring Route: Plan the wiring route to minimize damage, abrasion, and exposure to the elements. Route the wires through protected channels or conduit to ensure durability.
Wiring and Electrical Connections
You'll need to carefully design and implement the wiring and electrical connections to guarantee a safe and efficient energy transfer from the solar panels to your vehicle's electrical system. This involves selecting the right gauge wire, ensuring proper insulation, and using connectors that can withstand the elements.
Voltage Regulators will play a vital role in regulating the output voltage of your solar panels, preventing damage to your vehicle's electrical components.
When designing your wiring layout, make sure to follow proper Electrical Grounding principles to prevent electrical shock and fires. This includes grounding your solar panels and ensuring that all electrical connections are securely fastened.
You'll also need to take into account the maximum current output of your solar panels and size your wiring accordingly. Using a wiring diagram can help you visualize your electrical connections and identify potential issues before they become major problems.
Securing the Solar Panel Array
With your wiring and electrical connections in place, it's time to focus on mounting and securing the solar panel array to your vehicle's roof or hood, ensuring a rigid and durable attachment that can withstand various driving conditions and environmental factors.
To achieve this, you'll need to take into account several key factors.
Here are three essential considerations:
-
Panel angles: Make sure your solar panels are installed at a favorable angle to maximize energy harvesting. A tilt of 30-40 degrees is usually recommended.
-
Mounting hardware: Choose high-quality, weather-resistant mounting hardware that can withstand wind resistance, vibration, and extreme temperatures.
-
Roof or hood reinforcement: Strengthen your vehicle's roof or hood to support the weight and stress of the solar panel array, especially if you have a larger or heavier setup.
Final Installation and Testing
Plug in the electrical connections to the solar panel array, and then switch on the system to initiate the final testing phase. Guarantee all connections are secure and meet the manufacturer's specifications.
Perform a visual inspection to verify that all components are properly installed and functioning as intended. Next, monitor the system's performance using a multimeter or an energy monitoring system to track energy output, voltage, and current. This Performance Monitoring will help you identify any potential issues or areas for improvement.
Once you've confirmed the system is functioning correctly, conduct a thorough inspection of the entire installation to assure Energy Efficiency. Check for any signs of wear, damage, or corrosion on cables, connectors, and mounting hardware. Verify that all electrical connections are secure, and the system is operating within the recommended parameters.
If everything checks out, your solar panel installation is complete, and you're ready to hit the road, powered by the sun!
Frequently Asked Questions
Can I Install Solar Panels on a Fiberglass or Plastic Roof?
You'll want to guarantee the solar panels adhere securely to your vehicle's roof, so if you have a fiberglass or plastic roof, you'll need a specialized panel adhesive that's compatible with the roof material to guarantee a strong bond.
How Do I Clean and Maintain My Vehicle's Solar Panels?
You'll be shocked how a million dust particles can sabotage your solar panels' efficiency! Regularly inspect your panels for dust accumulation, and create a cleaning schedule tailored to your climate; adjust the panel tilt for best cleaning and energy harvesting.
Will Solar Panels Affect My Vehicle's Aerodynamics and Fuel Efficiency?
When you add solar panels to your vehicle, you'll increase air resistance, altering its aerodynamics. In a wind tunnel, the drag coefficient will rise, resulting in a speed reduction, ultimately affecting your fuel efficiency, so be prepared for a slight impact on your vehicle's performance.
Can I Charge My Vehicle's Battery While It's in Motion?
As you're on the move, did you know 60% of electric vehicles use regenerative braking to recharge their batteries? You can indeed charge your vehicle's battery while in motion, leveraging regenerative braking and roadside charging to maximize energy harvesting.
Are Solar Panels Durable Enough to Withstand Off-Road Driving?
You're wondering if solar panels can withstand off-road driving's rough terrain and extreme weather? Yes, modern solar panels are designed to be durable, with tempered glass and anodized frames, making them perfect for your adventurous lifestyle.
Related Posts
-
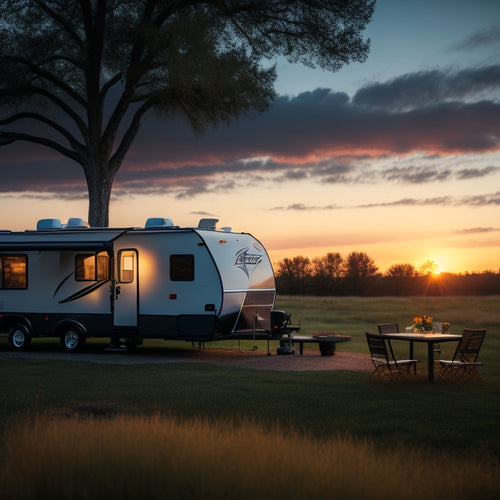
7 Best RV Battery Charging Panels for Your Adventures
You're searching for reliable and efficient solar charging solutions to power your RV battery on the go. Explore top-...
-
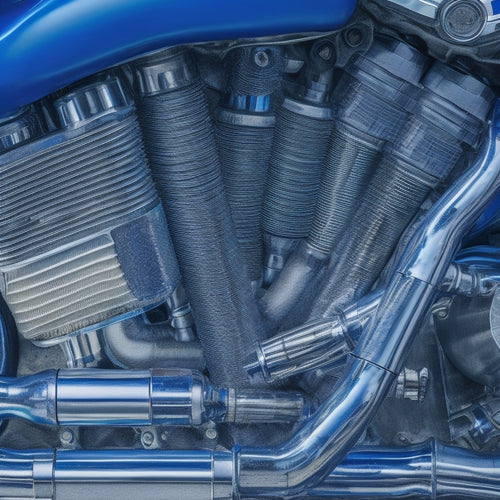
3 Ways to Increase Motorcycle Horsepower
You're about to unleash your motorcycle's hidden power by exploiting three key areas. First, upgrade your electric mo...
-
Why Choose Green Automotive Accessories for Your Ride?
By switching to eco-friendly automotive accessories, you can reduce your carbon footprint, save up to 20% on fuel cos...


